Restoration Projects

It is not a matter of if it will happen, but when it will happen: a system will require some data to be restored. Like any restoration project, there are numerous ways to approach this task and typically the best method will depend upon the scope of the restoration. In our world, this can range from restoring an entire volume of database tables to a select group of database rows. Recently, one of our enterprise clients ran into this very problem when pre-existing business logic simply wiped out a number of critical records. This situation quickly became an urgent priority since it was directly impacting production on the factory floor. Fortunately, since only a few rows were affected the effort required to recover the data from a backup was rather simple.
One way to approach this task is to restore a complete copy of the OpenInsight system, launch it, and then copy the data directly into the target system using aliased tables or do this indirectly by using an intermediary location and then use the target system to pull in the data. However, in this situation we were prevented from a full restore because there wasn’t enough room on the available hardware. Furthermore we had to work with an IT team that operated remotely and provided little support other than restoring files. We were short on time and resources.
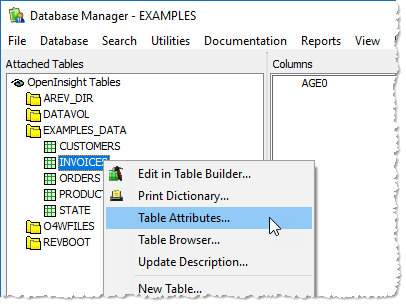
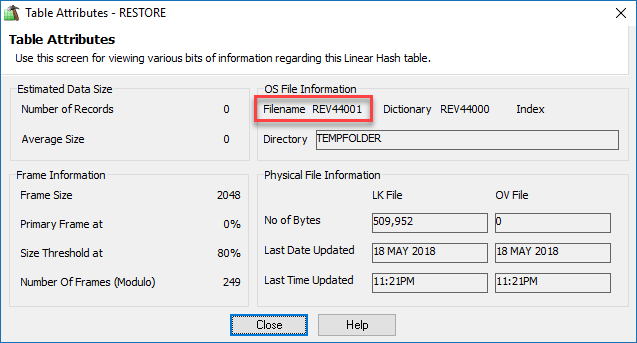
Our eventual solution to this problem is nothing remarkable, but it is a reminder of how a little of bit knowledge of OpenInsight internals can lead to a creative solution. The first problem we needed to tackle was instructing the IT support team which OS files we needed. Since we did not need the dictionary nor did we need to worry about indexes, all we absolutely needed to have was the data table. However, IT support won’t have any idea what OS files correspond to our database table. Here is where the Database Manager is our friend. We just navigate to the appropriate table (we’ll use the INVOICES table from the EXAMPLES database for this article), right-click and select the Table Attributes menu:
 This will bring up a dialog from which the OS filename can be identified along with the directory where the files can be found:
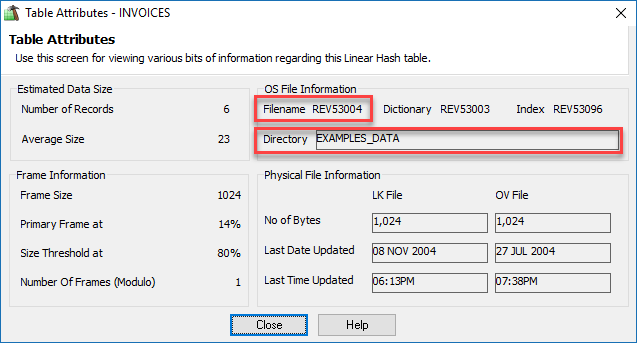
Of course, we remember that each table in OpenInsight is actually represented by a pair of OS files. The filename in the dialog is really just the filename bereft of its sibling extensions: .LK and .OV. Nevertheless, restoring two OS files is much easier than restoring an entire volume (or more) of system and application files. We simply asked that IT support restore these files into a temp folder that we could easily access.
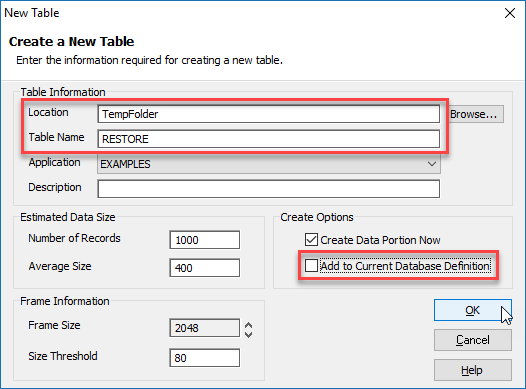
Note, we did not restore the media map. For those unfamiliar with this term, the media map is another pair of OS files (to wit: REVMEDIA.LK and REVMEDIA.OV). It is a special table that OpenInsight uses to store the relationship between the internal table names and the external OS filenames. Hence, without the media map, OpenInsight cannot see our restored files as a database table. We could have restored the original media map, but this would have likely introduced new complications (like FS404 errors) that are beyond the scope of this article to discuss. However, the flexibility of OpenInsight presents us with an easy solution: we just need to create a new table (we’ll call it RESTORE for this article) in an empty folder (we’ll create one called TempFolder). Since this will be a temporary table we will untick the Add to Current Database Definition checkbox:
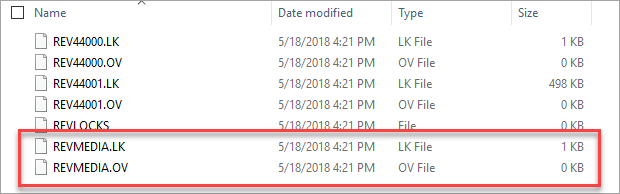
By creating a new table, a new media map will get created automatically:
But, how do we associate this new media map in one folder with the restored files sitting in a different folder? As previously noted, the media map is basically a pointer system that links database table names to OS filenames. Since our perfectly good media map already has a pointer to a table called RESTORE, we just need to get the OS name for this table using the handy dandy Database Manager once again:
Now that we know the expected OS filenames, we can go to our restored OS files and rename them to match. At this point we can either copy the renamed OS files into our TempFolder directory or we can copy our REVMEDIA files into the folder with the renamed OS files. It might be easier to take the first route, but large file sizes might make it quicker to take the second route. Once the restored OS files and the new media map are together in the same folder, just use the Database Manager to Add (Attach) the RESTORE table (remember, even though we restored the INVOICES files, the media map thinks these files belong to a table called RESTORE).
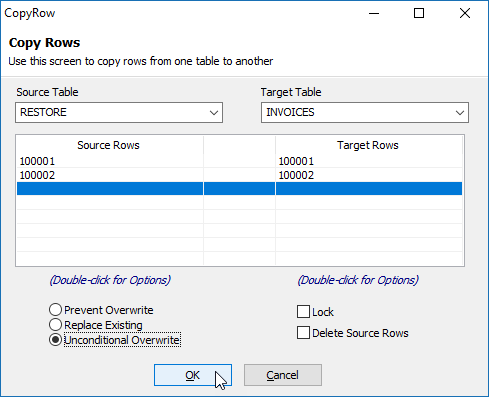
All that remains is to use the most efficient way available to copy (overwrite) the data rows from the RESTORE table into the INVOICES table (e.g., COPY_ROW command). Because the table names are different, there is no need to use an alias:
Of course, once the task is complete just delete the two temp folders and everything should be back on track.
Leave a Reply