SRP Calendar Control
 We are proud to announce our latest addition to the SRP ActiveX Control suite: the SRP Calendar Control. This control brings an Outlook-style calendar to your OpenInsight applications and was released as beta with version 4.0.3 of SRPControls.ocx, which means you can try it out now. This article will give you a brief overview of how to get the control up and running in your application.
Getting Started
In order to successfully get the SRP Calendar Control up and running, however, you need to perform certain steps in order.
Look and Feel
The first thing you’ll typically do is setup the control’s visuals. This starts with setting the control to one of the pre-built themes via the Theme property. Then, you’ll want to initialize the View property to day, week, or month view. From there you can use the CaptionVisible and DatePickerVisible properties to hide any components you don’t want the user to see. Here’s the same control using the Office 2013 theme:

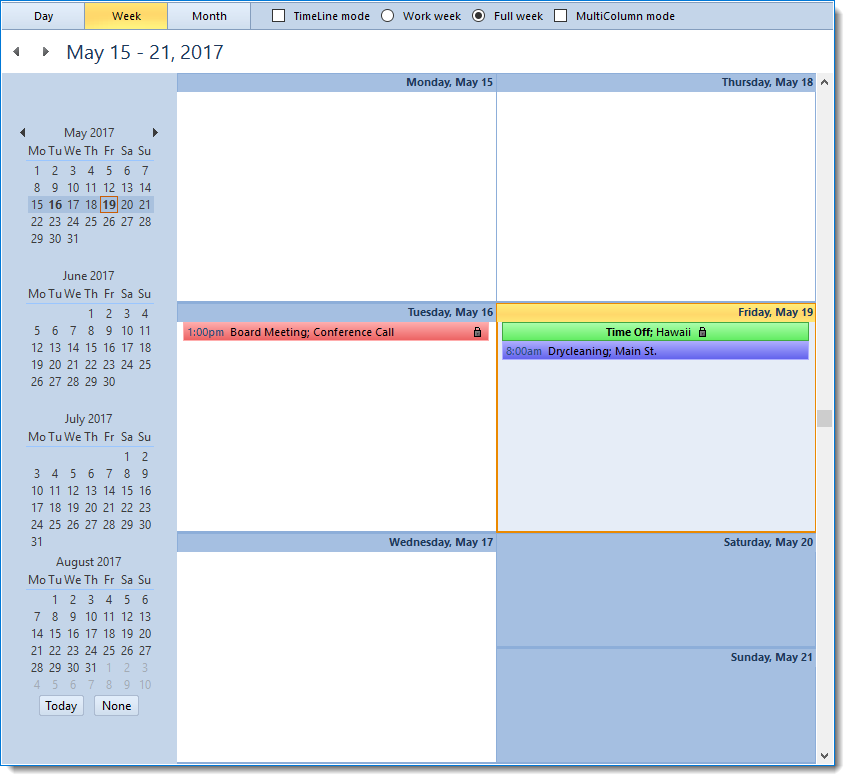
Calendars
The Calendar control is just that: a control. But under the hood, it can manage multiple abstract calendars. This allows you to show calendars for multiple people in the same control. The first step in populating the SRP Calendar Control with data is to always add one or more abstract calendars using the CalendarList property.
Calendars =""Calendars<-1> ="PERSONAL":@VM:"Personal"Calendars<-1> ="WORK":@VM:"Work"Set_Property(Ctrl,"OLE.CalendarList", Calendars)
Labels
One of the most helpful features of any calendar is the ability to categorize appointments using colors. Your next step will usually be to create a collection of colorized labels using the Labels property. You will reference the labels by name later on when you add appointments.
Labels =""Labels<-1> ="Personal":@VM:"Blue L=70"Labels<-1> ="Urgent":@VM:"Red L=70"Labels<-1> ="Available":@VM:"Green L=70"Set_Property(Ctrl,"OLE.Labels", Labels)
Appointments
You are now ready to add appointments. Initially, you’ll add a bunch of appointments using the ApptList property, but you can always add more appointments later using the AddAppts method. Note that each appointment has its own unique key even if the appointments are in different calendars. Each one also references an abstract calendar that will be its parent. You’ll also notice that the above labels are referenced by name, ensuring the appointment takes on that label’s color.
Appts =""Appts<1,1> ="PERSONAL"Appts<1,2> ="10001"Appts<1,3> = IConv(OConv(Date(),"D4/"):" 8:00AM","DT")Appts<1,4> = IConv(OConv(Date(),"D4/"):" 8:30AM","DT")Appts<1,5> ="Drycleaning"Appts<1,6> ="Don't forget to pick up dry cleaning on the way to work."Appts<1,7> ="Main St."Appts<1,8> ="Personal"Appts<1,9> ="OutOfOffice"Appts<1,10> ="High"Appts<2,1> ="WORK"Appts<2,2> ="10002"Appts<2,3> = IConv(OConv(Date(),"D4/"):" 1:00PM","DT")Appts<2,4> = IConv(OConv(Date(),"D4/"):" 3:00PM","DT")Appts<2,5> ="Board Meeting"Appts<2,6> ="Meeting with the Board to discuss next fiscal quarter."Appts<2,7> ="Conference Call"Appts<2,8> ="Urgent"Appts<2,10> ="High"Appts<2,11> =0Appts<2,12> =1Appts<3,1> ="WORK"Appts<3,2> ="10003"Appts<3,3> = IConv(OConv(Date(),"D4/"):" 3:30PM","DT")Appts<3,4> = IConv(OConv(Date(),"D4/"):" 4:30PM","DT")Appts<3,5> ="Staff Meeting"Appts<3,6> ="Weekly staff meeting."Appts<3,7> ="Conference Room"Appts<3,8> ="Available"Appts<3,10> ="High"Appts<3,11> =0Appts<3,12> =1Set_Property(Ctrl,"OLE.ApptList", Appts)
Give a Try
This should be enough to get you started with the control. There is a fully detailed reference guide already available for further assistance on our wiki. We’d love to hear from you, whether it’s feedback or a request for assistance, on our discussion boards.
Thanks. Looking forward to playing with this and updating our Calendar control.